Friday, 24 February 2012
Storyboard of the 'Sorting Through Photos" Scene (whole thing)
Character is evaluation/ sorting through the photos:
longshots
Midshots
Over the Shoulder
Close ups
Extreme Close ups
Birds eye view
Different angles
STYLISED EDITING
Picks up a particular photo of victims backing up against the wall :
Over the shoulder + Close ups.
ENTER MURDER SCENE
(another story blogger in blogger)
Leads to split Scene:
1. inspecting the knife & murdered body PHOTOS
2. TAKING the photos
Ends with murderer just standing starting at the photos.
QUE TITLE.
Labels:
Dilan Aktas,
Isha Sesay,
saskie logan,
Victoria Adeyi
FONTS (discussion)
THE FONT WE DECIED TO GO WITH IS "PortagolITC IT" AS IT IS BOTH BOLD AND CLEAR. IT REPRESENT THRILLER AND SORT REFLECTS THE STORYLINE OF MOVIE OPENING.
Labels:
Dilan Aktas,
Isha Sesay,
saskie logan,
Victoria Adeyi
Foley Sound For "Reminisce" Murder Scene
In the murder scene of "Reminisce" we have decided that we will use foley sound in various places of the scene, for example when Victoria opens the door viciously we would like to use a loud banging sound to exaggerate the tension of the scene. We would also use foley sound for when Saskie takes steps back due to being scared of the intruder with a knife. As a group we thought that a creaking sound would be effective as it builds tension in the scene. Another place where we would like to use foley sound would be when Victoria bangs the camera on the table, by doing this we are adding more tension to the scene as there is already a close up of this. We are also going to use foley sound for when Victoria takes a picture of Saskie by using a louder clicking sound.
Labels:
Dilan Aktas,
Isha Sesay,
saskie logan,
Victoria Adeyi
Wednesday, 22 February 2012
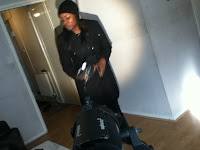
During filming (first day)
this is during our first day of filming. we had to work out how to locate the lights and equipment properly without damaging household furniture, as well as moving them around. we also had to take turns in using the camera because sometimes one actor was needed whereas another time it would be two actors. our main challenge during filming was using the lights as sometimes it would too bright and create a big circle affect or shadows in the background. how ever overall it was succesful because we got a rage of shots.
Labels:
Dilan Aktas,
Isha Sesay,
saskie logan,
Victoria Adeyi
Stylized Editing Tutorials
Because none of our group are professional editors or have used Final Cut Pro in the past, we have found a number of Youtube tutorials to help us with specific parts of the Stylized Editing process, that we will be going through.
Split Scene Editing.
We are going to use this to show the link between the photos and the murder scene.Slow/Fast Motion
we plan on making some parts of the murder scene speed up and other slower, and so this would need re-timing skills.
Colour Correction
We want our sences to be slightly darker and 'thriller' looking for a more professtional look.
Colour Splash
It is possible that we will be using colour splash for our murder scene at the end to emphasize the blood caused from the murder.
Labels:
Dilan Aktas,
Isha Sesay,
saskie logan,
Victoria Adeyi
Photos to be edited and used in our Thriller
These are the pictures that we are going to use in our scene when filmin, we are going to edit them and print them out to use.
This shot of the neck with the blood we took does not really look real as the blood is too thick. Whereas, the picture below looks much more realistic as its taken from a distance which we don't see much of the thickness of the blood.
Labels:
Dilan Aktas,
Isha Sesay,
saskie logan,
Victoria Adeyi
First Day Filming
We started our filming with the murder scene, that took place in the victims house. We had a storyboard to follow however, had to change some parts so that it matched with the rest of the scene. We all took part in using the camera so that we all had a chance to see how the filming process was. Victoria was playing the murderer and Sakie was the victim. I (Dilan) was holding the light most of the time so that our scenes were bright. The filming took about an hour and a half as we followed the storyboard so we knew what we was doing. As a group we had fun filming and everything went well, we didn't have any trouble filming.
Wednesday, 8 February 2012
Murder scene story board
Labels:
Dilan Aktas,
Isha Sesay,
saskie logan,
Victoria Adeyi
Draft of What Will Be in Our Photos


Labels:
Dilan Aktas,
Isha Sesay,
saskie logan,
Victoria Adeyi
Subscribe to:
Comments (Atom)


